Using OS_Builder utility to create XML OS update packages for installation via WiFi Direct
Summary
This unofficial/unsupported utility is designed to simplify fast creation of XML-based OS update packages for updating Zebra devices in the field via another Zebra device acting as a host which creates a WiFi Direct hotspot. This allows very rapid OS upgrades and downgrades (full OS image and/or LifeGuard updates) using a WiFi Direct hotspot created on a device such as a TC52. Typical file transfer time for a full 1.5GB OS image is less than 2 mins using this method and no additional infrastructure or hardware is required.
Overview
When a customer requires OS updates to devices in the field, it may be necessary to visit each site in order to apply the update . Updates can be made via Sdcard , WiFi or ADB but these methods are time consuming and may require installing a fragile sdcard. Alternatively, WiFi Direct can provide a much faster local hotspot for OS updates and is supported on all current generation Zebra Android products. Typical OS transfer time will be in the range 2 to 5 mins per device for a full 1.4GB image (depending upon the WiFi capability of the devices used) and the only requirement for the client devices to be upgraded is that the StageNow client is accessible.
The os_builder utility described here will automatically create the required raw XML profiles for either upgrading or downgrading via each of these methods. You could also create the profile using StageNow and export the XML using the ‘Export for MDM’ option if you prefer. In this case you just need to use the same IP address and similar filepath in the FileMgr steps as shown in the sample XML at the end of this post.
If creating a profile via os_builder.exe , the resulting profile will include a condition manager step to check for the battery level being >30% before downloading the OS update file . As the default operation of the OS loader is to only check battery level just before the reflash begins, this saves downloading files onto a device with insufficient battery power to install the update.
Method
- Download the required OS images to your PC (images are available at http://support.symbol.com
- Download OS Builder tools (highed numbered revision posted here: http://zebra.airsetup.com/2021/os_builder/
- Unzip to a local drive working folder e.g. c:\osbuilder. Note that this utility is not working if installed on a network drive.
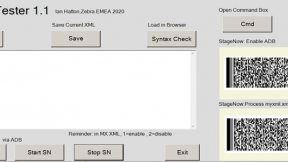
- Run os_builder.exe
- Enter a meaningful project name e.g. t10_16-10_u16_down. In this particular nomenclature, the t indicates the device family (sd660) , the 10 is the Android version (A10) , 16-10 is the Zebra base OS image version , u16 is the LifeGuard patch version (I use U00 if there is no LG patch in the update package) and up/down indicates either upgrade or downgrade.
- Press Create and the additional menu items below will be enabled
- Select OSUpdate from menu and then OSFile from the sub-menu .
- Browse to the full OS update zipfile if this package includes a full update or to a LifeGuard patch if only installing the patch (profile can contain either OS or LG patch or both). If installing both, select the full OS image first and the LG patch second.
- The required XML to download the image(s) to the client device will be added to profile and displayed in the XML preview window below
- From OSUpdate menu , you can also select StreamUp (Streaming Upgrade) or StreamDown (Streaming Downgrade) . This is useful for MX10.1 and later devices which have smaller flash memory (16GB) as it is not necessary to have sufficient free storage memory for the OS image. Streaming only works with a full OS update package (not LG packages) and will download and apply the package at the same time with the reflash progress shown in the Notification bar . Overall time to reflash is similar to using the standard upgrade/downgrade option.
- If you selected OSFile (rather than StreamUp/StreamDown) from the OSUpdate menu , select either Upgrade or Downgrade in order to include the appropriate XML for either option .
- The XML for the profile is now complete- select Exit from menu to save XML and exit app
- The project folder created under your working folder will now contain all the required files for the OS update
- Copy the complete project folder to /sdcard/stagenow on the Zebra device you will use for hosting the profiles (this folder will be present on all devices by default)
Host Device
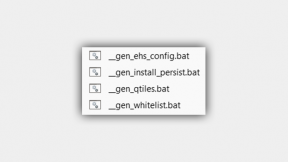
- Install the hosting utilities on the host device by reading the StageNow barcode below on a device with a preconfigured Internet connection.
- This will install EHS and the required utilities:
HTTPServer – local web server
PDANet+ - creates a WiFi Direct hotspot
WiFi Connection – generates a barcode/NFC tag to connect to WiFi Direct hotspot
StageNow Mobile – generates either a StageNow barcode or NFC file
- Follow the steps below in order to configure the host device for serving the OS images
- Run HTTPServer and press OFF button to enable server (ON indicates that it is running)
- Run PDANet+ and enable WiFI Direct Hotspot – icon will appear in Notification bar to indicate it is running. Note that there is a relatively short ‘no connection detected’ timeout for this hotspot so check that the icon is present before trying to connect
- Use WiFi Connection app to generate a WiFi profile for connecting to the PDANet hotspot
- Run StageNow Mobile and select folder and XML file to deploy . Long press on XML in order to show menu to select barcode generation if NFC (default) is not used
- Disable WAN data on client device (if it is enabled)
- Client device(s) are connected to host via WiFiDirect either manually or using a SN profile. The SN profile can be generated using the WiFi Connection utility which will prompt for the Network name and the passcode and then call StageNow Mobile to automatically generate the profile barcode as shown below
- After successful connection via WiFi Direct, the MAC address of the client device should appear as ‘Connected’ in the blue band at the top of the PDANet+ screen as shown below:
- From the EHS Home screen , select StageNow Mobile , browse to the folder under /sdcard/stagenow which contains the OS update profile , select the XML file via long press to popup the menu and select Barcode. Scan the barcode (or bump the NFC profile) on the client device. The OS image download or stream should now start (download progress indicator will be displayed in the StageNow client ). After download completes, the OS reflash status will be shown by pulling down the notification panel .
- If StageNow reports a Download failed error, check that the webserver is running on the host device (button should be ON). Sometimes I have seen that it may be necessary to reboot the client after connecting to WiFi Direct hotspot in order to ensure IP routing is correct.
Modifying existing profiles:
Changing action from upgrade to downgrade (or vice versa)
In the original project folder, edit the projectname.xml file with a text editor. At the end of the file is the PowerMgr step which performs the upgrade or downgrade - change the ResetAction value to 10 (upgrade) or 11 (downgrade) . Save the file using a different filename and copy back to the host device before install using StageNow Mobile
<!--OSUP-->
<characteristic version="4.2" type="PowerMgr">
<parm name="ResetAction" value="10" />
<characteristic type="file-details">
<parm name="ZipFile" value="/data/tmp/public/f08_32-04_u16_up.upl" />
</characteristic>
</characteristic>
Adding a LifeGuard patch to a full OS update profile
- Copy the LifeGuard patch file to the project folder
- Edit the projectname.UPL file to add the LG patch as the second line in the file e.g.
-
- package:HE_FULL_UPDATE_10-16-10.00-QG-U00-STD-HEL-04.zip
- package:HE_DELTA_UPDATE_10-16-10.00-QG-U44-STD-HEL-04.zip
-
- Edit the projectname.XML file to add the LG patch file transfer step (keep all filepaths the same and just change the filename) e.g.
<!--FILEDIRECTOS-->
<characteristic type="FileMgr" version="5.0" >
<parm name="FileAction" value="1"/>
<characteristic type="file-details">
<parm name="TargetAccessMethod" value="2"/>
<parm name="SourceAccessMethod" value="1"/>
<parm name="SourceURI" value="http://192.168.49.1:12345/stagenow/t10_16-10_u44_full_up/HE_DELTA_UPDAT…"/>
<parm name="TargetPathAndFileName" value="/data/tmp/public/HE_DELTA_UPDATE_10-16-10.00-QG-U44-STD-HEL-04.zip"/>
</characteristic>
</characteristic>
- Copy the project folder to /sdcard/stagenow
- Install using StageNow Mobile

Ian Hatton


