DataWedge Free-Form Image Capture
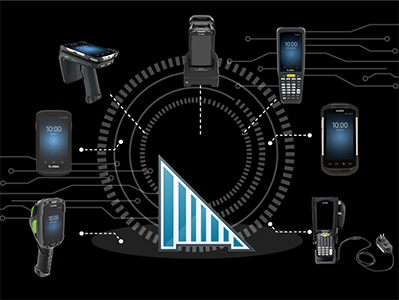
DataWedge 11.2 introduces new, powerful options to capture data with advanced "Workflows" including the ability to highlight specific barcodes in the field of view, capture images with the scanner and OCR (optical character recognition) for real world objects such as ID cards or vehicle license plates.
This is the second part of a series of posts about the new Workflows feature. Other posts can be found here:
- Barcode Highlighting
- Free-Form image capture
- DataWedge OCR | What it is and how to control it
- DataWedge OCR | Identity Documents
Documentation for this feature is spread over multiple sections on the techdocs portal:
- The Workflow Input Plugin
- The Workflow Programmer's Guide
- The Changes to the Notification API for Workflow
Free-Form Image Capture
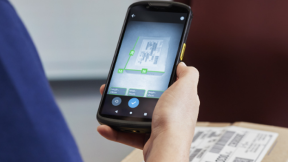
Even if your device does not have a camera, you can now capture an image using the barcode scanner. Any barcodes that have been seen during the capture session will be returned to your app along with the image (even if they are no longer in frame).
Possible uses of Free-Form Image Capture
- Capture an image through the device imager (scanner), without a camera. This has been a long-standing request which the team has worked hard to deliver.
- Capture proof of delivery and the tracking barcode in a single step
How to configure Free-Form Image Capture
Free-Form Image capture is delivered through a new DataWedge input plugin called 'Workflow'. This is separate from the standard 'Barcode' input plugin.
To configure free-form image capture, configure your DataWedge profile as follows:
- Enable the Workflow input plugin. If doing this through the DataWedge UI, you will be prompted that you cannot have both the Barcode and Workflow input plugins active.
- Scroll down to the 'Image Capture' section of the plugin and enable it.
- Press the ellipsis to bring up additional parameters
- Choose the input source, either camera or imager
- Set the session timeout, in ms. This is the length of time the scanning session will be held open, if the trigger was not pulled.
- Select 'Decode And Highlight Barcodes' to return data. Although set to 'Highlight' only by default, most use cases will also want to return data.
- Set the additional feedback parameters, such as haptic feedback, LED notification and decode audio feedback. This is the feedback that will be given whenever a new barcode is seen and decoded in the viewfinder, so as you pan across multiple barcodes your device will tell you whenever it sees a barcode.

How to use Free-Form Image Capture
- The hardware or software trigger will initiate the data acquisition session
- As the system sees barcodes, it will highlight them to let the user know it has been seen. Note: it is NOT possible to change the highlight colour with free-form image capture.
- The next trigger press will capture the image. The user can step back if need be, to ensure the entire object is within view.
- If the 'Decode / Highlight' option is turned on, barcodes that had been highlighted along with the image will be returned.
Video Demos of Free-Form Image Capture
The following video shows free-form image capture via the Imager:
This is a brief scanning session with many barcodes in view.
The following video shows free-form image capture via the Camera:
The user pans across many barcodes during a long scanning session.
Coding and Free-Form Image Capture: Receiving Data
The Workflow programmer's guide gives a lot of detail how to parse workflow return types. The code applicable to free-form image capture is given below
//  Given the data returned via 'intent'
String data = intent.getStringExtra("com.symbol.datawedge.decode_data");
JSONArray dataArray = new JSONArray(data);
for (int i = 0; i < dataArray.length(); i++)
{
  JSONObject workflowObject = dataArray.getJSONObject(i);
  if (workflowObject.has("string_data"))
  {
    String label = workflowObject.getString("label");
    if (label.equalsIgnoreCase(""))
    {
      //  Each decoded barcode is stored in workflowObject.getString("string_data")
      //  Symbology returned in workflowObject.getString("barcodetype")
    }
  }
  else
  {
      //  string_data is absent, therefore this is an image
      if (workflowObject.has("uri")) {
        String uriAsString = workflowObject.get("uri").toString();
        byte[] imageAsBytes = null;
        imageAsBytes = processUri(uriAsString); //  Extract data from content provider
        int width = workflowObject.getInt("width");
        int height = workflowObject.getInt("height");
        int stride = workflowObject.getInt("stride");
        int orientation = workflowObject.getInt("orientation");
        String imageFormat = workflowObject.getString("imageformat");
        //  See the sample or programmer's guide for getBitmap(...)
        Bitmap bitmap =
          ImageProcessing.getInstance().getBitmap(imageAsBytes, imageFormat, orientation, stride, width, height);
        //  Show bitmap on UI
      }
   }
}
Coding and Free-Form Image Capture: Configuring DataWedge
There are two ways to configure free-form image capture in code. This section is similar to the previous post that covered this for barcode highlighting, but some of the detail is different.
1. At Runtime:
A new API has been introduced in DataWedge 11.2, Switch Data Capture to allow you to switch from 'regular' scanning to any of the workflow input options.
The full code example in the help docs for Switch Data Capture refers exclusively to OCR. For a free-form image capture example you can copy the format provided in the Set Config Example:
Intent i = new Intent();
i.putExtra("com.symbol.datawedge.api.SWITCH_DATACAPTURE", "WORKFLOW");
Bundle paramList = new Bundle();
  paramList.putString("workflow_name","free_form_capture");
  paramList.putString("workflow_input_source","2");
  Bundle paramSetContainerDecoderModule = new Bundle();
    paramSetContainerDecoderModule.putString("module","BarcodeTrackerModule");
    Bundle moduleContainerDecoderModule = new Bundle();
      moduleContainerDecoderModule.putString("session_timeout", "16000");
      moduleContainerDecoderModule.putString("illumination", "off");
      moduleContainerDecoderModule.putString("decode_and_highlight_barcodes", "1");
    paramSetContainerDecoderModule.putBundle("module_params",moduleAParams);
    //  Feedback params omitted from this code sample
  ArrayList<Bundle> paramSetList = new ArrayList<>();
  paramSetList.add(paramSetContainerDecoderModule);
  paramList.putParcelableArrayList("workflow_params", paramSetList);
i.putExtra("PARAM_LIST", paramList);
sendBroadcast(i);
The above code should be used as guidance only, please see techdocs for full code samples
2. Persistently:
A new section has been added to the existing SetConfig API for Workflow Input Parameters.
There is a dedicated SetConfig example for free-form image capture.
Coding and Free-Form Image Capture: Registering for change
The RegisterForNotification API has been updated to report the status of the workflow plugin.
Register to receive the Workflow notifications. See the RegisterForNotification docs for more detailed code:
Bundle b = new Bundle();
b.putString("com.symbol.datawedge.api.APPLICATION_NAME", getPackageName());
b.putString("com.symbol.datawedge.api.NOTIFICATION_TYPE", "WORKFLOW_STATUS");
Process the received notification
case "WORKFLOW_STATUS":
  Log.d(LOG_TAG, "WORKFLOW_STATUS: status: " + b.getString("STATUS");
  break;
Be aware: Any Intent API sent to DataWedge before the 'PLUGIN_READY' status will lead to undefined behaviour.
Some additional notes for Free-Form Image Capture:
- The order the results are given will be the order in which the barcodes were seen by the decoding algorithm, this will correspond to the order the user passed over them.
- Captured Barcodes are reported via the Intent plugin as
com.symbol.datawedge.data - If multiple barcodes are captured, the data returned in
com.symbol.datawedge.data_stringwill return all data without any separators. It is recommended to usecom.symbol.datawedge.datainstead. - As stated in the documentation, the keystroke output will concatenate all the data without any separators. This means the Intent plugin is really the only viable way to receive data.

Darryn Campbell
1 Replies
Hi!
Referring to the "Decode and Highlight Barcodes" Function, how can the default symbologies be changed?
Unfortunately, the needed Interleaved 2OF5 is disabled by default: https://techdocs.zebra.com/datawedge/latest/guide/input/workflow/#freeformimagecapture
Any hints? Thanks!!
Andreas


